Upload Files From Ev3 Brick to Computer
Creating and running programs
Now that y'all've fix your computer and EV3 Brick, yous're ready to offset writing programs.
To get in easier to create and manage your programs, let'due south showtime have a quick look at how MicroPython projects and programs for your EV3 robots are organized.
Programs are organized into project folders, every bit shown in Figure viii. A project folder is a directory on your computer that contains the principal program (main.py) and other optional scripts or files. This projection folder and all of its contents will exist copied to the EV3 Brick, where the main plan will be run.
This page shows y'all how to create such a project and how to transfer it to the EV3 Brick.
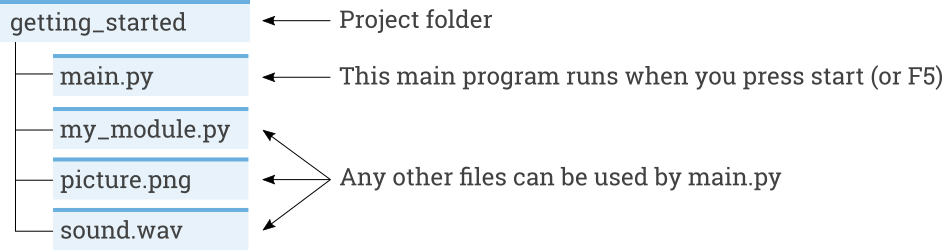
Figure 8 A project contains a plan called master.py and optional resources similar sounds or MicroPython modules.
Creating a new projection
To create a new projection, open the EV3 MicroPython tab and click create a new project, as shown in Figure 9. Enter a project proper noun in the text field that appears and press Enter. When prompted, choose a location for this program and confirm by clicking choose folder.
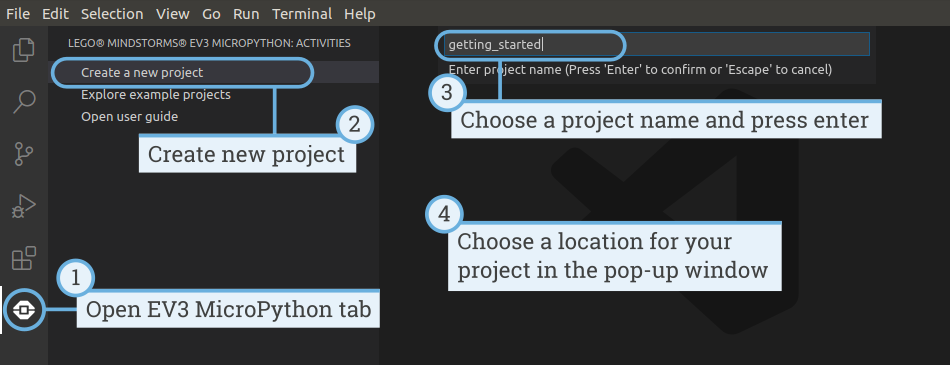
Figure 9 Creating a new project. This example is called getting_started, but you can cull any name.
When you create a new project, it already includes a file chosen main.py. To see its contents and to modify information technology, open up information technology from the file browser as shown in Figure 10. This is where you'll write your programs.
If y'all are new to MicroPython programming, we recommend that you go on the existing code in place and add together your code to it.
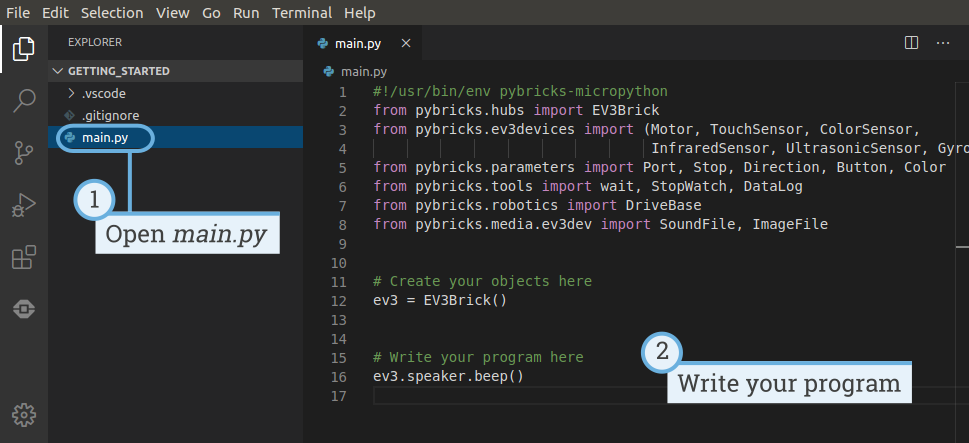
Effigy 10 Opening the default primary.py program.
Opening an existing project
To open a project you created previously, click File and click Open Folder, as shown in Figure 11. Side by side, navigate to your previously created project folder and click OK. You tin also open up your recently used projects using the Open Contempo menu selection.
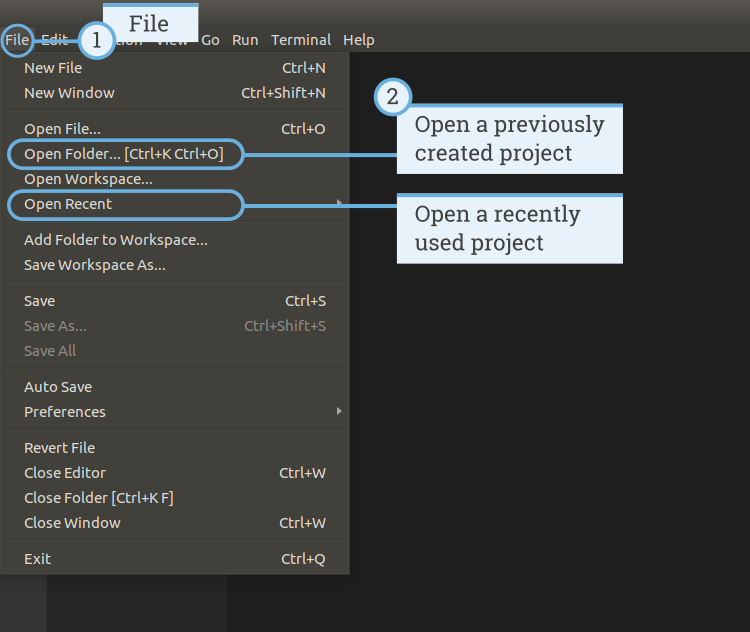
Effigy 11 Opening a previously created project.
Connecting to the EV3 Brick with Visual Studio Code
To exist able to transfer your lawmaking to the EV3 Brick, you'll start need to connect the EV3 Brick to your figurer with the mini-USB cable and configure the connection with Visual Studio Code. To do so:
- Plow the EV3 Brick on
- Connect the EV3 Brick to your computer with the mini-USB cablevision
- Configure the USB connexion every bit shown in Figure 12.
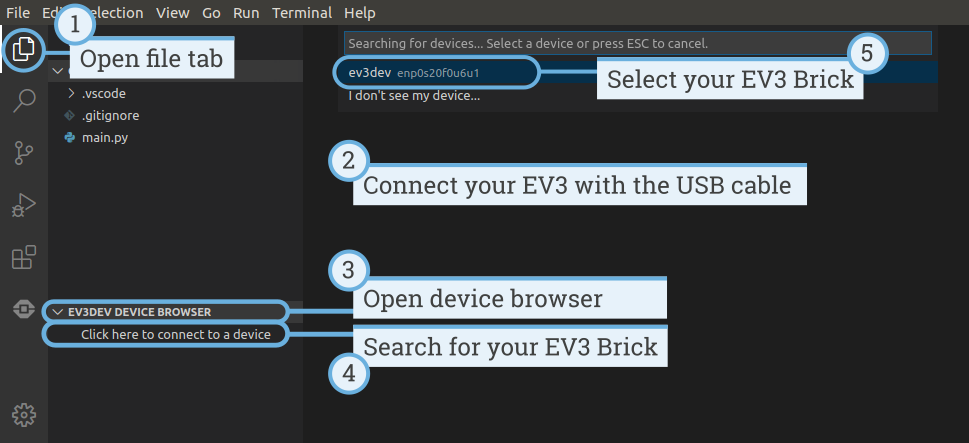
Figure 12 Configuring the USB connectedness between the reckoner and the EV3 Brick
Downloading and running a plan
You tin printing the F5 fundamental to run the program. Alternatively, you tin can start information technology manually by going to the debug tab and clicking the green start arrow, as shown in Figure 13.
When the program starts, a pop-upwardly toolbar allows you to finish the programme if necessary. You tin can also finish the program at any time using the back button on the EV3 Brick.
If your program produces any output with the impress command, this is shown in the output window.
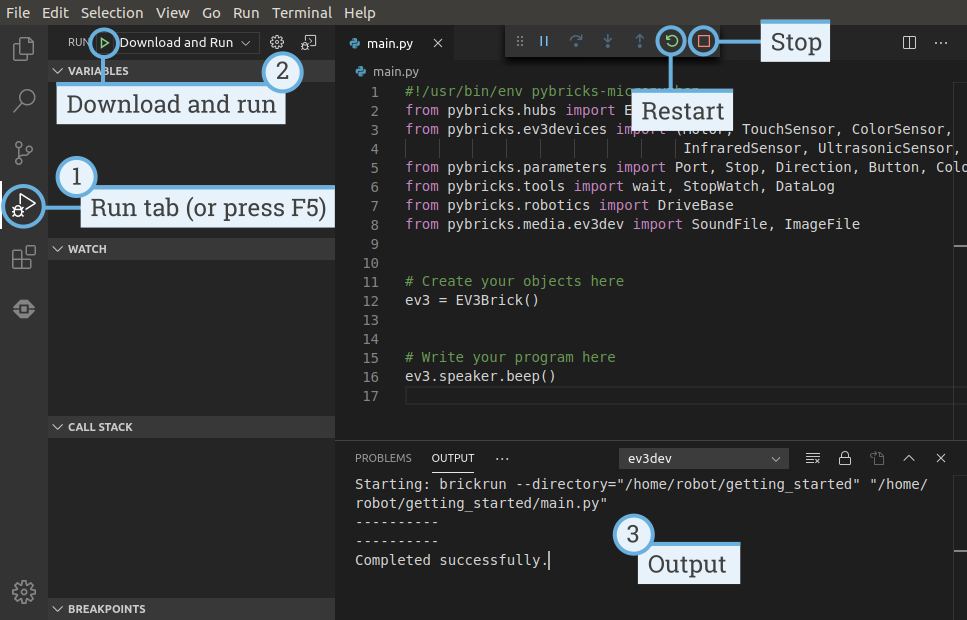
Figure 13 Running a program
Expanding the instance plan
At present that you've run the basic code template, you lot can expand the program to make a motor motion. First, adhere a Large Motor to Port B on the EV3 Brick, equally shown in Figure 14.
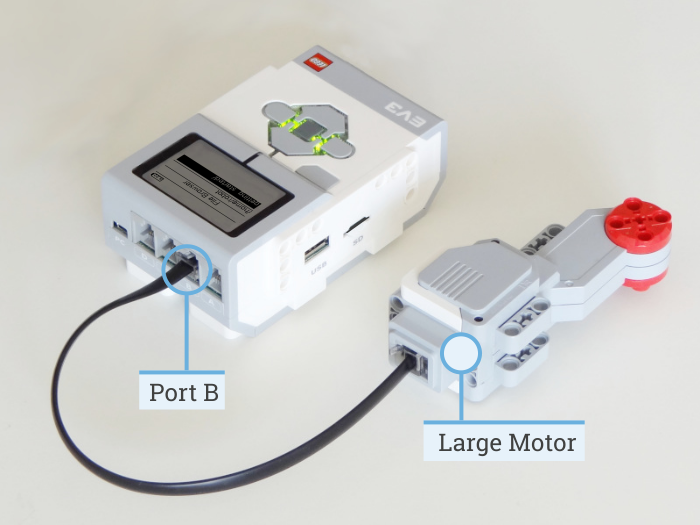
Effigy 14 The EV3 Brick with a Large Motor fastened to port B.
Side by side, edit principal.py to make information technology wait similar this:
#!/usr/bin/env pybricks-micropython from pybricks.hubs import EV3Brick from pybricks.ev3devices import Motor from pybricks.parameters import Port # Create your objects here # Initialize the EV3 Brick. ev3 = EV3Brick () # Initialize a motor at port B. test_motor = Motor ( Port . B ) # Write your plan here # Play a sound. ev3 . speaker . beep () # Run the motor up to 500 degrees per second. To a target bending of 90 degrees. test_motor . run_target ( 500 , xc ) # Play another beep audio. ev3 . speaker . beep ( frequency = 1000 , duration = 500 ) This programme makes your robot beep, rotate the motor, and beep over again with a higher pitched tone. Run the program to brand sure that it works equally expected.
Managing files on the EV3 Brick
After you've downloaded a project to the EV3 Brick, you lot can run, delete, or support programs stored on it using the device browser every bit shown in Figure fifteen.
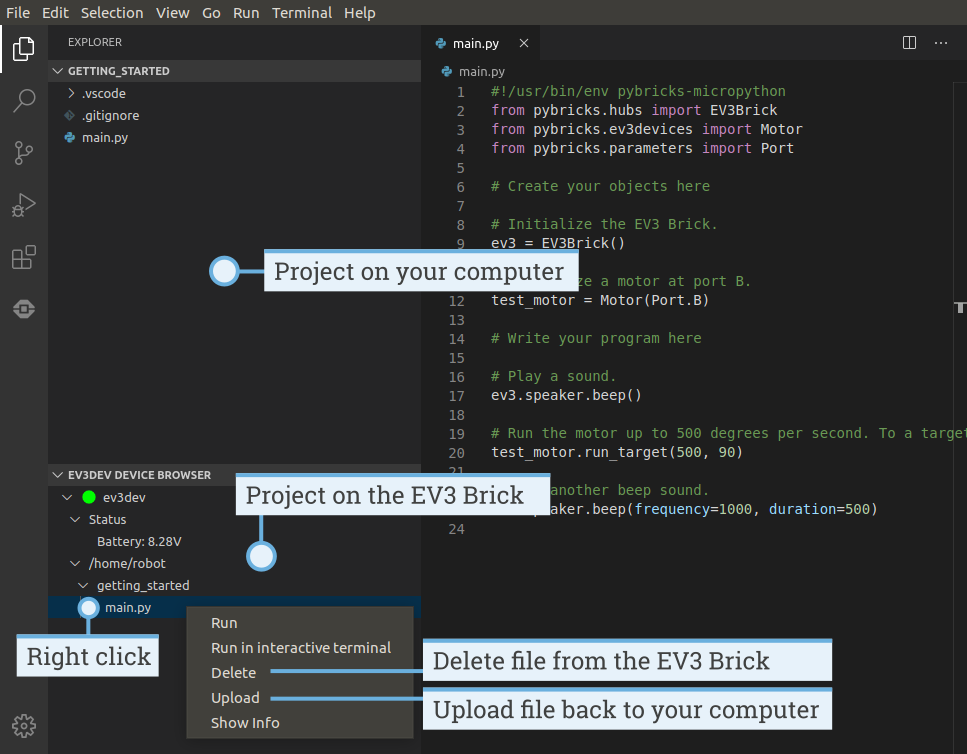
Figure fifteen Using the EV3 device browser to manage files on your EV3 Brick
Source: https://pybricks.com/ev3-micropython/startrun.html
0 Response to "Upload Files From Ev3 Brick to Computer"
Post a Comment